
Introduction
Upgrading or replacing a door latch in your motorhome can sometimes create a challenge when the new latch is smaller than the original. This leaves gaps or extra space in the cutout, which can compromise security, insulation, and aesthetics. Learning how to patch a motor home door with a new latch smaller than the previous one ensures a professional and secure finish.
In this guide, we’ll walk you through the step-by-step process to properly patch the door and install the new latch seamlessly.
Why You Need to Know How to Patch Motor Home Door with New Latch Smaller
When installing a smaller latch, the leftover cutout in the door can lead to:
✅ Reduced security, making the door easier to break into.
✅ Air or water leaks, causing discomfort inside the motorhome.
✅ Weak door structure, leading to long-term damage.
✅ Aesthetic issues, making the door look unfinished or damaged.
By following the right patching method, you can ensure durability and a clean look.
Tools and Materials Needed to Patch Motor Home Door with New Latch Smaller
Before starting the process of how to patch a motor home door with a new latch smaller, gather the following items:
- Patch material (wood, metal, or composite filler plate, depending on the door)
- Epoxy adhesive or industrial-strength glue
- Screwdriver and drill
- Measuring tape
- Sandpaper or file
- Paint or finishing materials
- Weatherproof sealant (to prevent leaks)
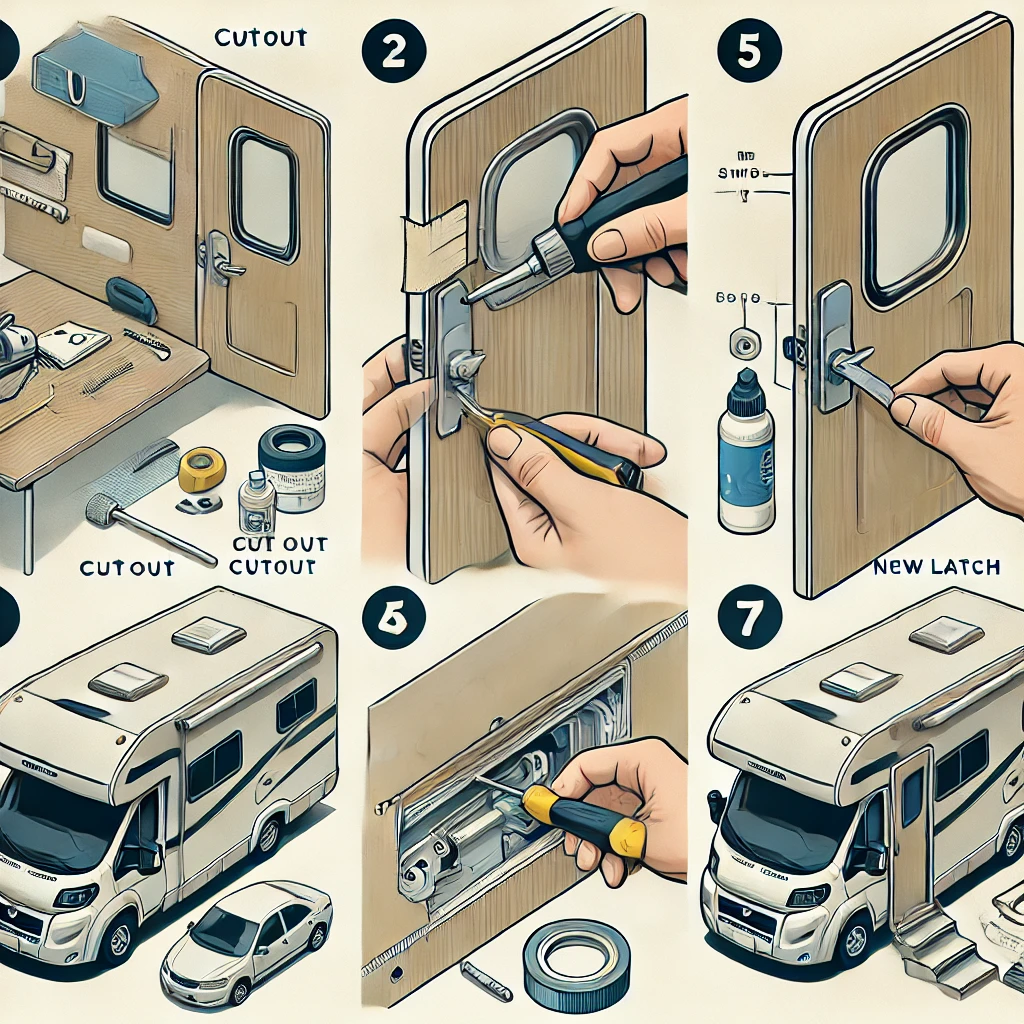
How to Patch a Motor Home Door with a New Latch Smaller
Step 1: Remove the Old Latch
- Carefully unscrew and take out the existing latch.
- Clean the cutout area, removing dust, rust, or adhesive residue.
Step 2: Measure the Cutout and New Latch Size
- Use a measuring tape to determine the size difference between the old cutout and the new latch.
- This helps in selecting the right patching material.
Step 3: Cut and Fit the Patch
- Choose a patching material that matches your door’s material.
- For metal doors: Use a metal filler plate.
- For wooden or composite doors: Use a wooden patch or filler.
- Cut the patch to fit the excess space left by the old latch.
- Ensure it fits snugly without gaps.
Step 4: Secure the Patch in Place
- Apply strong adhesive or epoxy around the edges of the patch.
- Insert the patch into the cutout and hold it firmly for a few minutes.
- If additional reinforcement is needed, drill small holes and use screws to secure the patch.
Step 5: Install the New, Smaller Latch
- Align the new latch in the center of the patched area.
- Mark and drill new screw holes if necessary.
- Secure the new latch tightly with screws.
Step 6: Seal and Finish the Door
- Use sandpaper to smooth out any rough edges.
- Apply paint or finish to blend the patch with the rest of the door.
- Use weatherproof sealant around the patch to prevent air or water leaks.
Final Checks and Adjustments
- Test the latch multiple times to ensure it locks and unlocks properly.
- Check for gaps or loose areas and reinforce with more adhesive or sealant if needed.
- Inspect the door’s alignment to ensure it closes securely.
Conclusion
Knowing how to patch a motor home door with a new latch smaller than the original ensures your RV door remains secure, insulated, and visually appealing. By following these steps, you can efficiently patch the door, install the new latch, and maintain the structural integrity of your motorhome.
Leave a Reply